INFO [07-27|17:33:30.439] Starting Parallax in ephemeral dev mode...
WARN [07-27|17:33:30.439] You are running Parallax in --dev mode. Please note the following:

  1. This mode is only intended for fast, iterative development without assumptions on
     security or persistence.
  2. The database is created in memory unless specified otherwise. Therefore, shutting down
     your computer or losing power will wipe your entire block data and chain state for
     your dev environment.
  3. A random, pre-allocated developer account will be available and unlocked as
     eth.coinbase, which can be used for testing. The random dev account is temporary,
     stored on a ramdisk, and will be lost if your machine is restarted.
  4. Mining is enabled by default. However, the client will only seal blocks if transactions
     are pending in the mempool. The miner's minimum accepted gas price is 1.
  5. Networking is disabled; there is no listen-address, the maximum number of peers is set
     to 0, and discovery is disabled.

INFO [07-27|17:33:30.439] Maximum peer count                       ETH=50 LES=0 total=50
INFO [07-27|17:33:30.439] Set global gas cap                       cap=50,000,000
INFO [07-27|17:33:30.553] Using developer account                  address=0xa7F18aD76a5F7e1F0d5BfB2E36CeDd7eC5324b29
INFO [07-27|17:33:30.553] Allocated trie memory caches             clean=154.00MiB dirty=256.00MiB
INFO [07-27|17:33:30.553] Writing custom genesis block
INFO [07-27|17:33:30.553] Persisted trie from memory database      nodes=12 size=1.82KiB time="15.958µs" gcnodes=0 gcsize=0.00B gctime=0s livenodes=1 livesize=0.00B
INFO [07-27|17:33:30.553] Initialised chain configuration          config="{ChainID: 1337 Homestead: 0 DAO: <nil> DAOSupport: false EIP150: 0 EIP155: 0 EIP158: 0 Byzantium: 0 Constantinople: 0 Petersburg: 0 Istanbul: 0, Muir Glacier: 0, Berlin: 0, London: 0, Arrow Glacier: <nil>, MergeFork: <nil>, Terminal TD: <nil>, Engine: clique}"
INFO [07-27|17:33:30.553] Initialising Parallax Protocol        name= versions=[] network=1337 dbversion=<nil>
INFO [07-27|17:33:30.553] Loaded most recent local header          number=0 hash=efac4a..3904e4 td=1 age=54y4mo5d
INFO [07-27|17:33:30.553] Loaded most recent local full block      number=0 hash=efac4a..3904e4 td=1 age=54y4mo5d
INFO [07-27|17:33:30.553] Loaded most recent local fast block      number=0 hash=efac4a..3904e4 td=1 age=54y4mo5d
WARN [07-27|17:33:30.554] Failed to load snapshot, regenerating    err="missing or corrupted snapshot"
INFO [07-27|17:33:30.554] Rebuilding state snapshot
INFO [07-27|17:33:30.554] Resuming state snapshot generation       root=2a9a45..bb4bda accounts=0 slots=0 storage=0.00B dangling=0 elapsed="132.083µs"
INFO [07-27|17:33:30.554] Gasprice oracle is ignoring threshold set threshold=2
WARN [07-27|17:33:30.554] Error reading unclean shutdown markers   error="not found"
ERROR[07-27|17:33:30.554] Failed to check db for legacy receipts   err="this operation is not supported"
INFO [07-27|17:33:30.554] Starting peer-to-peer node               instance=Prlx/v1.0.0-stable-95cf8a9f/darwin-arm64/go1.20.6
WARN [07-27|17:33:30.554] P2P server will be useless, neither dialing nor listening
INFO [07-27|17:33:30.554] Generated state snapshot                 accounts=10 slots=0 storage=412.00B dangling=0 elapsed="287.166µs"
INFO [07-27|17:33:30.554] Stored checkpoint snapshot to disk       number=0 hash=efac4a..3904e4
INFO [07-27|17:33:30.556] IPC endpoint opened                      url=/var/folders/j2/t2yw6xxs20sfnb1qlr4hc9br0000gn/T/prlx.ipc
INFO [07-27|17:33:30.556] New local node record                    seq=1,690,490,010,555 id=7d74b1101188406b ip=127.0.0.1 udp=0 tcp=0
INFO [07-27|17:33:30.556] Started P2P networking                   self=enode://7f6c9244dc6ffeb0824085cf67a75bc0a6fafc8fc5490690c474ea3fefb8c97478fedd9aeb7163e3dbed865d0586f7e811af596660c0d9be6a5cb6956993233e@127.0.0.1:0
INFO [07-27|17:33:30.556] HTTP server started                      endpoint=127.0.0.1:8545 auth=false prefix= cors=http://remix.ethereum.org vhosts=localhost
INFO [07-27|17:33:30.556] Transaction pool price threshold updated price=0
INFO [07-27|17:33:30.556] Updated mining threads                   threads=0
INFO [07-27|17:33:30.556] Transaction pool price threshold updated price=1
INFO [07-27|17:33:30.556] Etherbase automatically configured       address=0xa7F18aD76a5F7e1F0d5BfB2E36CeDd7eC5324b29
WARN [07-27|17:33:30.556] Failed to get free disk space            path= err="failed to call Statfs: no such file or directory"
INFO [07-27|17:33:30.556] Commit new sealing work                  number=1 sealhash=48e711..4b52d3 uncles=0 txs=0 gas=0 fees=0 elapsed="31.916µs"
WARN [07-27|17:33:30.556] Block sealing failed                     err="sealing paused while waiting for transactions"
INFO [07-27|17:33:30.556] Commit new sealing work                  number=1 sealhash=48e711..4b52d3 uncles=0 txs=0 gas=0 fees=0 elapsed="91.75µs"


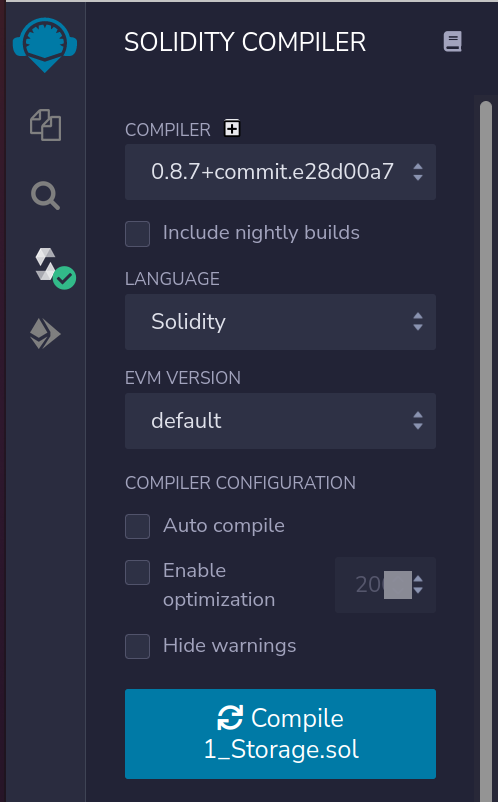
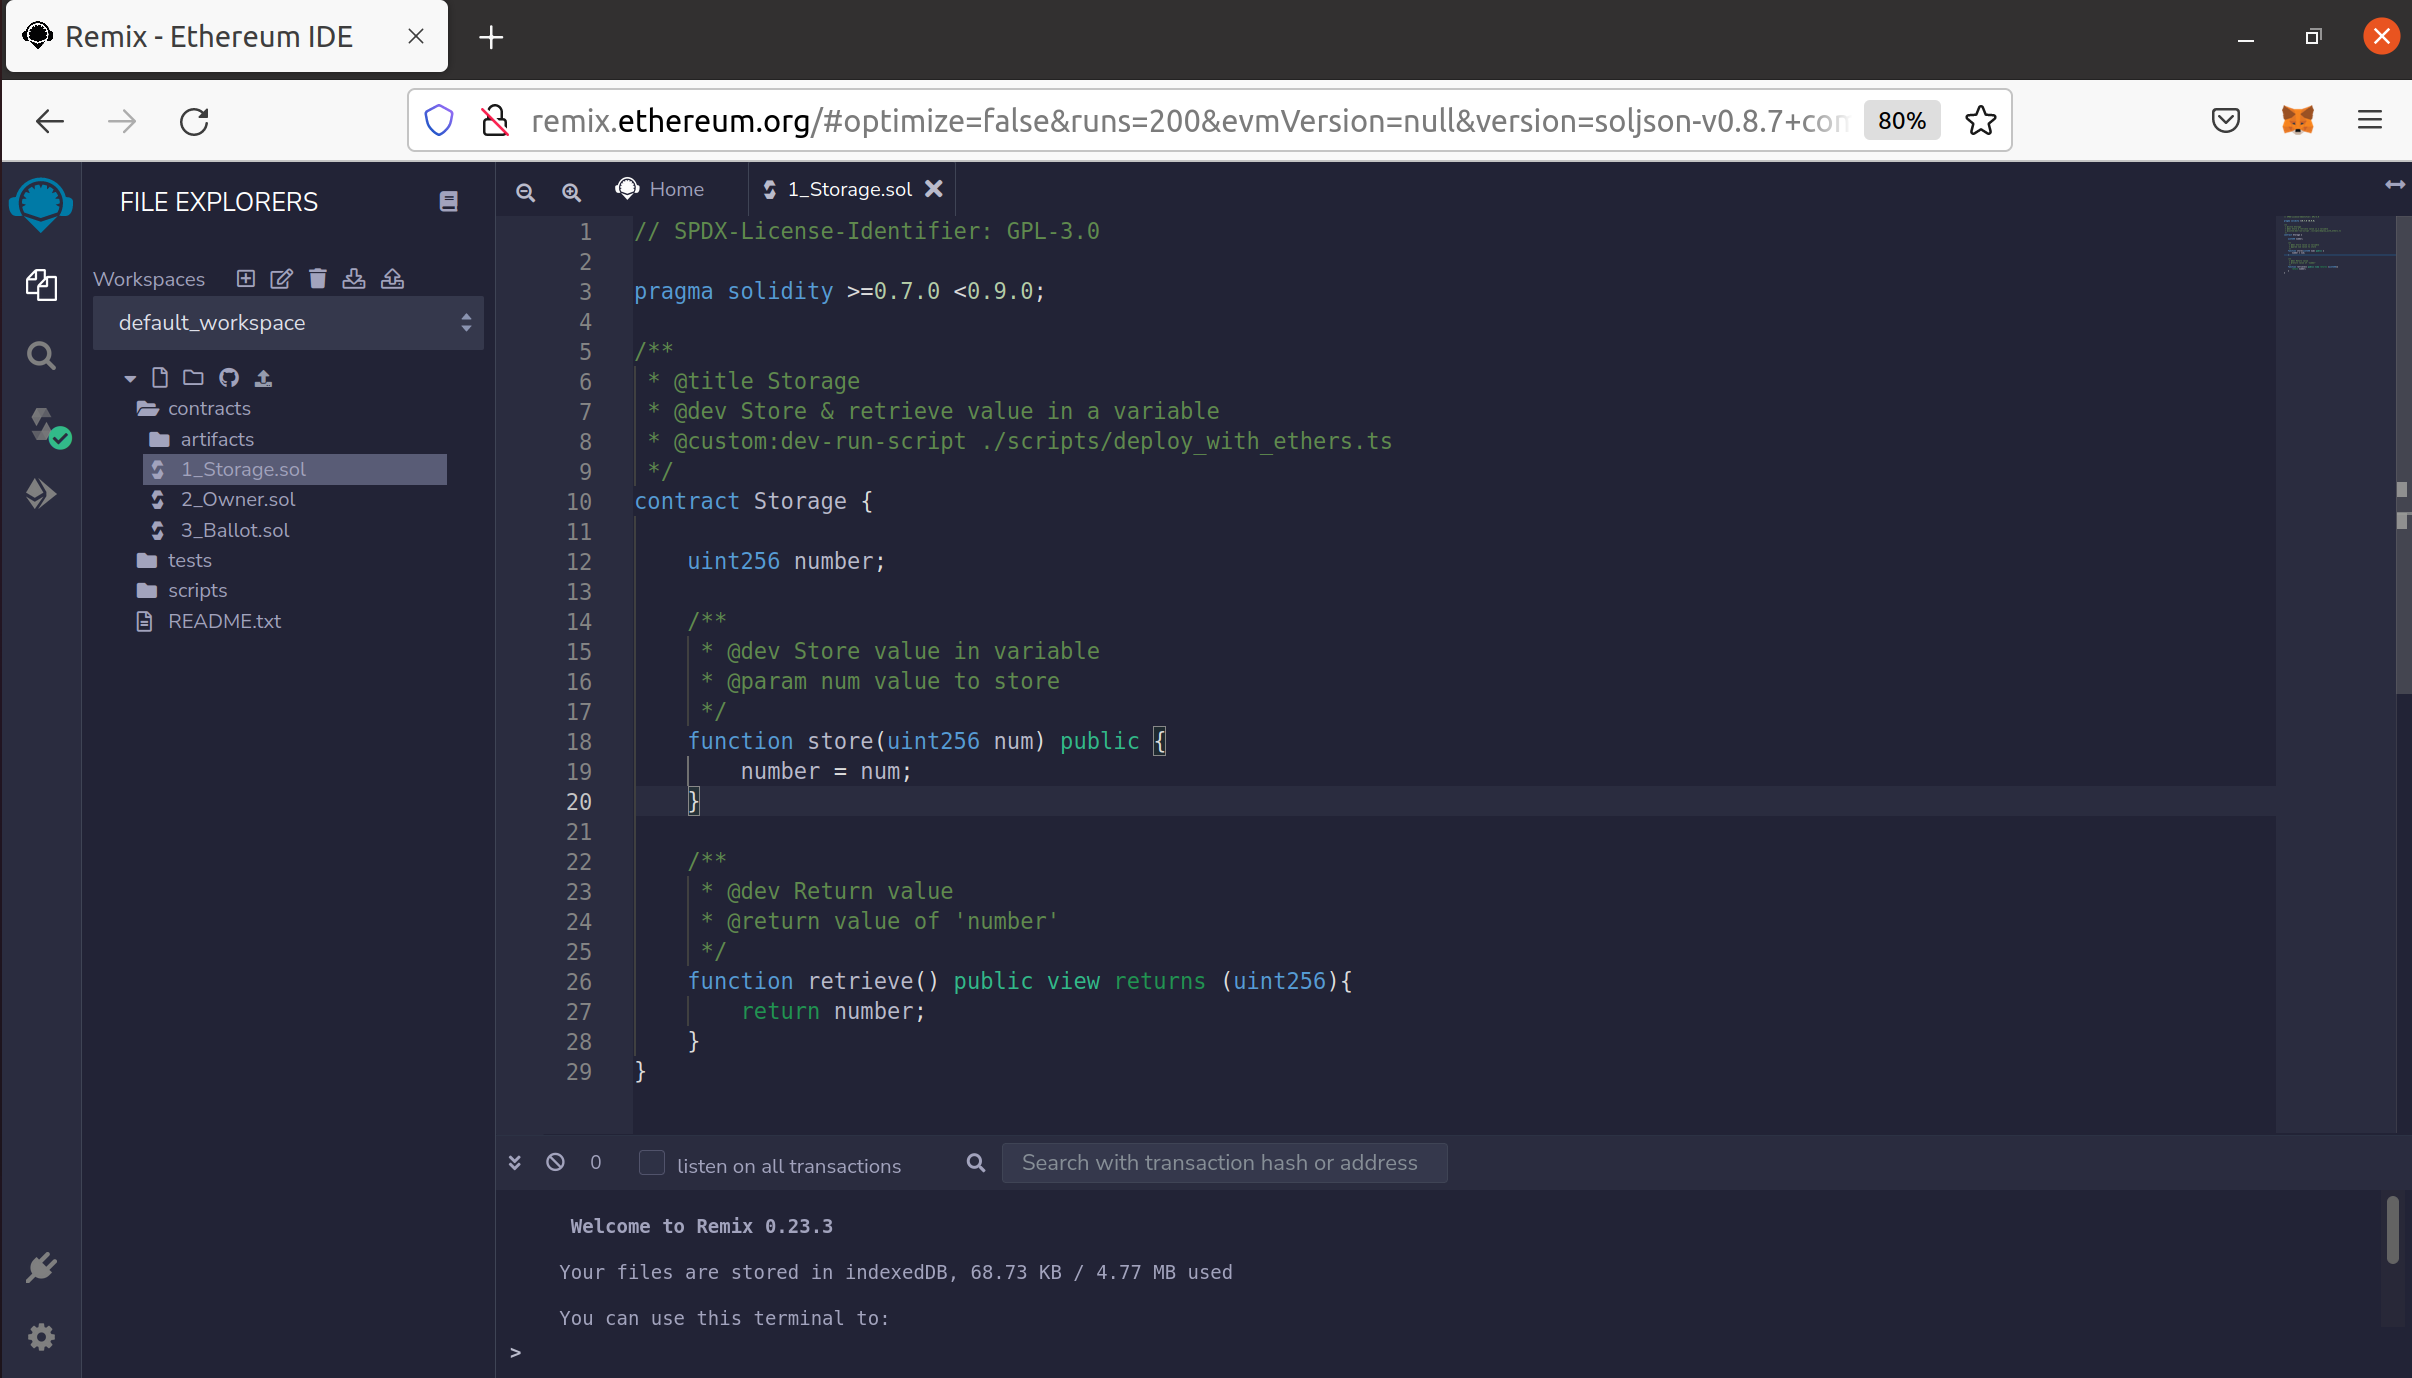 The Solidity logo is present as an icon in the Remix side-bar. Clicking this icon opens the Solidity compiler wizard. This can be used to compile
  Below the Solidity icon is a fourth icon that includes the Ethereum logo. Clicking this opens the Deploy menu. In this menu, Remix can be configured to connect to the local Parallax client. In the drop-down menu labelled
 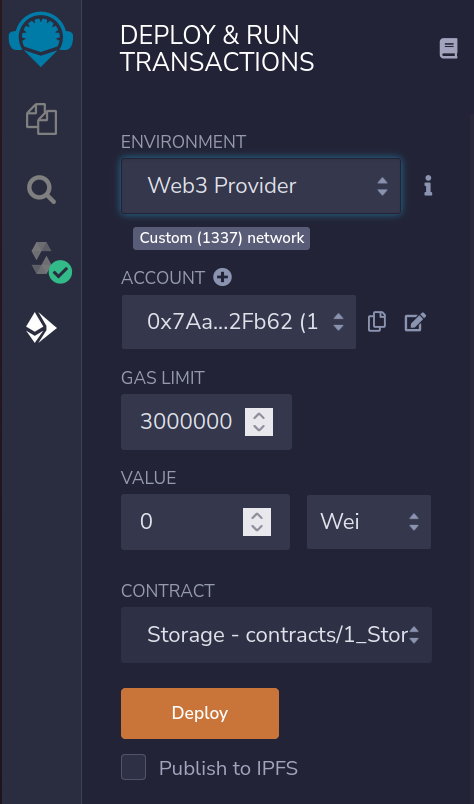 To deploy
 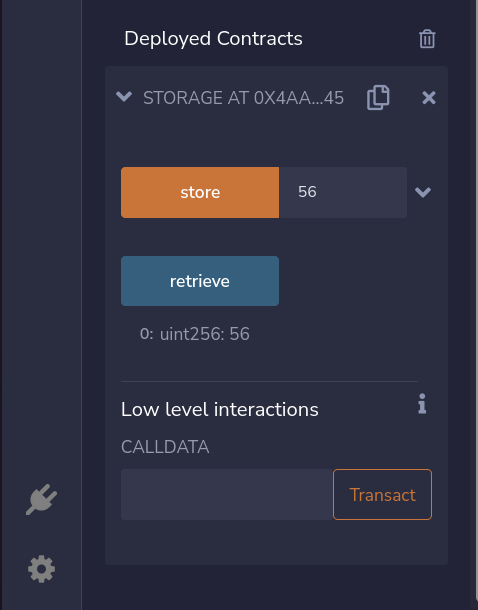 In the Parallax client terminal, the following logs confirm that the transaction was successful (the actual values will vary from the example below):